Bending wood defies laws of nature but can be done


Q: I have a corner in a home office where I want to build a corner cabinet. The question is how to make the front of the cabinet round so that the radius of the front goes from one wall to the other. Also, I haven’t decided if I want to paint it or have it stained so the wood shows through. How can I make the front of the cabinet rounded?
A: Bending a sheet of wood to form a perfect arc defies the laws of nature and is nearly impossible — unless you have a couple of inside secrets.
Typically, you would have to build a form and then glue thin laminations of wood to one another around the form, clamping the whole mess together until it dries. When the wood is removed from the form, it retains the shape.
Another method is to use a bendable plywood and laminate it with a veneer. But this is challenging and time-consuming as well.
Still, employing bendable plywood is easier and slightly faster since you don’t have to laminate as many sheets together to get the curve. You will have to go to a lumberyard and ask for the product. I’ve heard it called by many names, including “wacky wood” and “bending board”; the lumberyard will know what you’re asking for.
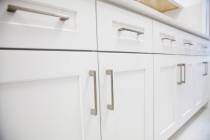
You will first need to build the body of the cabinet. Use ¾-inch cabinet-grade plywood, as you won’t see these pieces. These pieces will form a 90-degree angle against the corner of the wall.
You will also need a top and bottom and at least one center shelf, depending on the height of the cabinet. These pieces will all have to be cut in a radius to match the front of the cabinet.
To cut the curve, you will need a router with a circle-cutting jig or you can use a piece of plywood screwed to the bottom of the router. The length of the plywood will depend on the length of the radius. When you determine the radius, nail one end of the jig down and cut the arc. Repeat for each piece.
With all of the cabinet pieces cut, glue and screw the top, bottom and shelves to the sides.
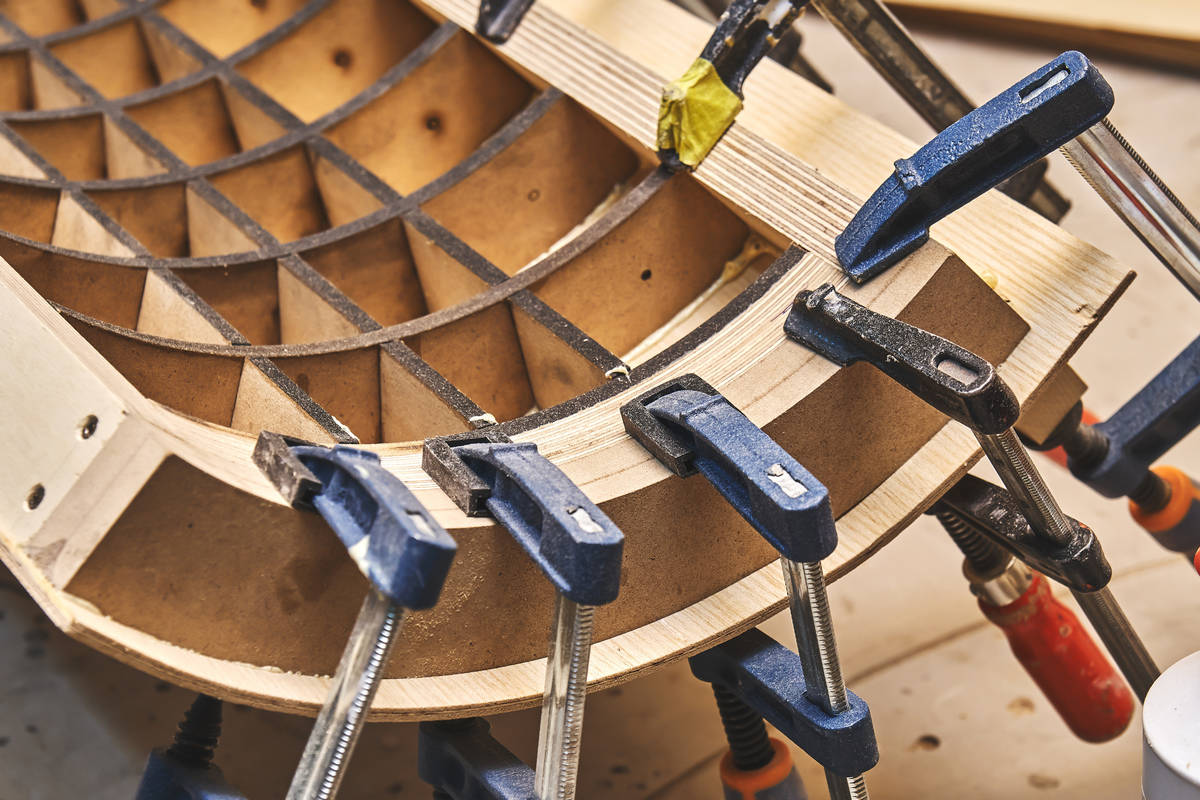
Now comes the tricky part, as you must bend the wood and get it to retain the curve. With the cabinet body together, you can actually use it as a form and bend the wood around it.
The front ends of the case will be attached to the curved face of the cabinet front, and the hinged doors will be cut right off of the case after the glue dries.
For this, though, you must use the bendable plywood and another layer of veneered plywood that measures one-eighth of an inch. This thin material will bend easily around the form, plus it’s attractive and will have nice figuring if you choose to stain it.
Wherever you choose to have the doors swinging, you have to block the glue from touching the doors. For this, you can use painter’s tape and place it on the top, bottom and shelving. Leave about 8 inches at the ends of these horizontal pieces as you want the glue to adhere to the front curved face on either side of the cabinet. (This is where you will attach the hinges for the doors.)
Apply the glue wherever the tape isn’t and screw the sheet of bendable plywood to the case. Now the piece will look like an enclosed curved cabinet.
The veneer will hold the curve after you have glued them together, and a two-part epoxy rolled onto both surfaces will hold the curve. Roll the epoxy on and lay the veneer onto the bendable plywood. Use strapping clamps at the top, bottom and at each shelf and ratchet them down to give uniform pressure over the curved surface.
Once the glue dries, you will cut the doors free. This is a challenge because the cuts have to be perfect. Remove the strapping clamps and use a circular saw with a guide to make the cuts. Set the depth of the saw so that it almost comes through the curved face, and you will cut at the point where the glue stops at the horizontal surfaces.
Line everything up and clamp a guide to the case. Then place a piece of painter’s tape along the blade’s path. This will reduce tear-out by the blade as it pulls out of the cut. Be sure to take each cut nice and slow. To finish the cut, you can use a fine-toothed handsaw or a sharp utility knife.
Measure the curved face and cut down the center to divide the doors. Then you can add a length of piano hinge along the cuts and screw the doors to the hinge.
This is a complex project that is sure to frustrate, but in the end, you can show it off and have people wonder just how you managed to bend a piece of wood.
Mike Klimek is a licensed contractor and owner of Las Vegas Handyman. Questions may be sent by email to handymanoflasvegas@msn.com. Or, mail to 4710 W. Dewey Drive, No. 100, Las Vegas, NV 89118. His web address is www.handymanoflasvegas.com.
Do-it-yourself
Project: Bending wood
Cost: From $100
Time: A weekend
Difficulty: ★★★★★