Options vary for installing undercabinet lighting


Q: Just off of my kitchen, I have a built-in desk with some cabinets hanging above it. I thought it would make a nice work area to pay bills, take phone calls, etc. I would like to install some undercabinet lighting. There is an outlet under the cabinets, but I don’t want a plug-in light, and I certainly don’t want a cord to show. So, how do I go about installing the light?
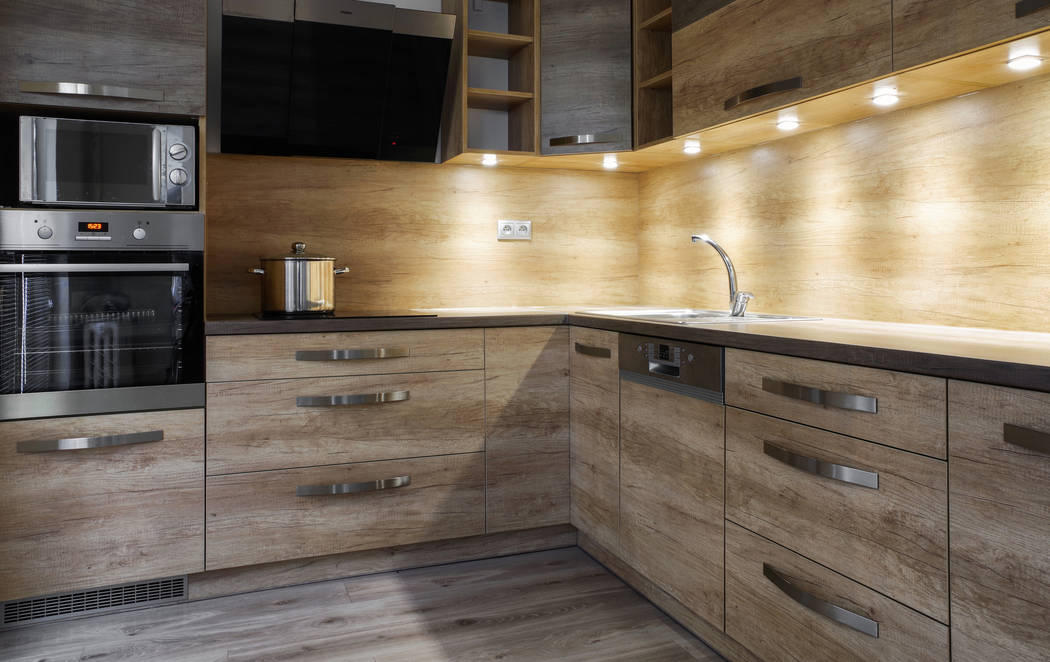
A: Undercabinet lighting is a slick way to light up a surface. The fixture is thin enough so that it is hidden underneath the front edge of the cabinet. The result is that it looks like the cabinet is shining light upon the surface. It’s like having a sunroof for your desk.
You can buy lots of different varieties of light fixtures, some with a cord and plug, others that are hard-wired and still others that are battery-operated that just stick to the underside of your cabinets.
Because you don’t want a cord to show, there are three options. The first is to hard-wire the fixture into the plug beneath the cabinet. The second option is to add an outlet inside the cabinet and plug the fixture in, and the third is to buy “hockey-puck” style lights that just stick under the cabinet. These are the battery-operated ones that you tap to turn on and off.
Of the hard-wired fixtures available, you will find some that have a cable included and some that do not. Just know what additional supplies you will need before you leave the home center.
Turn off the power at the main panel, remove the cover plate on the outlet and gently pull the outlet away from the box.
Move the wires out of the way so that you have access to the top or back of the box. If the box is metal, use a screwdriver to pop out the knock-out plug in the top or back. If the box is plastic, you will need to pry open the plastic clamps to gain enough room to fish a cable through it.
If the circuit is 15 amps, use 14-2 NM (nonmetallic) cable. For 20 amp circuits, use 12-2 NM cable.
Drill a hole directly over the outlet and right below the cabinet. You want to run a cable down to the outlet and then cover the hole with the fixture, so make sure the hole is aligned with the outlet. Don’t make the hole so big that the fixture won’t be able to cover it. The fixture will be at least 1¼ inches thick, however, so you don’t have to be too bashful about the size of the hole.
Push some fish tape up through the box in the vicinity of the hole. When you see the fish tape, use a coat hook or needle-nose pliers to reach in and pull it out. With the fish tape sticking out of the hole, bend the electrical cable around the fish tape and tape it all together with electrical tape. The method will make it so that the cable and the fish tape won’t separate as you are pulling them through the wall.
In all likelihood, as the distance between the hole and the outlet will be small, you might be able to stick the cable through the hole and right down into the box. May the electrical gods be smiling upon you as you try this. Pull extra cable into the box so that it sticks out of the box and doesn’t accidentally slip back into the wall.
Hold a template for the fixture against the underside of the cabinet and mark the screw holes. Pre-drill them and insert the screws so that there is a little room between the underside of the screw head and the bottom of the cabinet.
Cut the cable coming out of the hole so that there is a little extra. Use a cable clamp where the cable enters the fixture and trim off about three-eighths of an inch of the wire insulation. Connect the black wires together, the white wires together, and finally the bare or green wires together. Use wire nuts for secure connections.
Place the fixture over the screw heads and tighten the heads. Then just insert the bulb or bulbs and snap the cover onto the fixture.
To make the electrical connection at the plug, you might be able to just wrap the wires around the outlet’s terminals (only if they are not being used). Don’t wrap two wires around one terminal.
If the terminals are not being used, wrap the wires clockwise around the terminals. The black hot wire wraps around the brass terminal and the white neutral wire wraps around the silver terminal. The bare or green wire gets connected to the grounding screw.
It is likely that the grounding screw will have a ground wire attached to it so you will need to pigtail the wires. Remove the wire attached to the grounding screw, then connect a short length of new wire to the grounding screw. Connect the pigtail wire, the wire that was connected to the ground screw, and the new wire feeding the fixture with a wire nut. You will follow this procedure with the hot and neutral wires if needed.
Turn the power back on and start paying the bills. If all this sounds like too much work, just get some “hockey puck” lights, drop a battery in them and stick them where you want. Instant light!
Mike Klimek is a licensed contractor and owner of Las Vegas Handyman. Questions may be sent by email to handymanoflasvegas@msn.com. Or, mail to 4710 W. Dewey Drive, No. 100, Las Vegas, NV 89118. His web address is www.handymanoflasvegas.com.
Do-it-yourself
Project: Undercabinet lighting
Cost: From $15
Time: 1-3 hours
Difficulty: ★★★