
Rock mulch can cause photinia to die back


Q: I took your recommendation and planted a Dapple Dandy pluot and Santa Rosa plum in the same hole about 18 inches apart. New growth has already started to appear. I’d now like to cut and lower the height of the Santa Rosa plum to the same height as the pluot. Is it too late to do that?
A: No, it isn’t too late to prune. People are mistaken when they think they can prune only during winter months or that they can’t prune once new growth appears.
One of my professors used to say, “The best time to prune is when the pruners are sharp.” I still agree with him. However I would alter that by adding, “as long as it is hand pruners.”
If you are removing large diameter wood using a saw or loppers, timing is more critical.
In short, go ahead and lower the height of that pluot. Make sure you whitewash the upper surfaces of any exposed limbs to reduce sunburn unexposed branches. I’ll talk about summer pruning next month. I will post more about this topic on my blog.
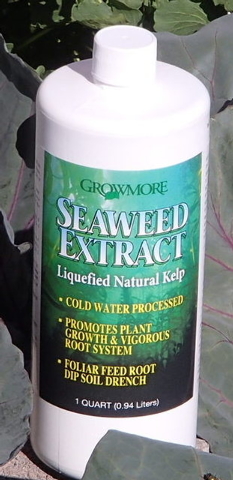
Q: I was reading an older article from Linn Mills (a leader in the Southern Nevada horticultural community and a longtime Las Vegas Review-Journal columnist who died in 2014) about foliar fertilizing tomatoes. Linn was saying to spray tomato plants with phosphorous. I read an organic gardening article that suggested using fish-seaweed extract. Which is better?
A: Great advice from Linn! You want to give tomatoes a complete fertilizer at the time of planting. You can use organic sources or conventional fertilizers. It will not make much difference to the plant.
These fertilizers can be applied to the soil or to the plant leaves if they are a liquid. After an initial application of a fertilizer, phosphorus should be in abundance, not nitrogen, with further applications.
The problem with organic sources like compost added to the soil at the time of planting is that the fertilizers or nutrients they contain last so long. This is because the nitrogen in compost is released slowly over several months. This is not true of organic foliar sprays such as seaweed extracts.
An overabundance of compost added to the soil will cause tomatoes to produce a lot of vine and delay flowering. This is not necessarily true of their close cousins, peppers and eggplants. If flowering is delayed in tomato plants and begins during the heat of the summer, fruit yield may be scant or nonexistent.
Inexpensive conventional fertilizers (farm fertilizers) release their nutrients quickly. One big shot is released during the first few irrigations; the amount of fertilizer available to the plant diminishes quickly after that.
With these quick-release or conventional fertilizers, at least the nitrogen component, lasts four to six weeks and then 80 percent of it is gone. Quick-release fertilizers, applied at planting time, are perfect for tomato growth and fruit production.
Foliar fertilizers, which are applied as a liquid to the leaves and stems, act very much like quick-release fertilizers applied to the soil. Liquid fertilizers applied to leaves last a very short time, two to three weeks.
Foliar fertilizers must be applied more often than fertilizers applied to the soils. Foliar fertilizers should always contain a wetting agent to help that fertilizer gain entry inside the plant.
We want tomato plants to gain size quickly for about four weeks before they set fruit. If nitrogen is released in large amounts after that, flowering will likely be delayed.
If you are foliar feeding, you should have at least two different types of foliar fertilizers, maybe even three. The two most important are a high nitrogen content (highest first number) fertilizer and the second is a foliar fertilizer with high phosphorus content (highest second number).
If you get a third one, then make it a fertilizer in a 1:1:1 ratio of nitrogen, phosphorus and potassium. Whenever possible, make sure the third number, potassium, is also high in all three fertilizers or make sure it is applied to the soil and available to plants.
Q: Our red-tip photinia seems to be dying. It is 8 years old and receives full sun. The leaves are turning brown and dry. Is a disease causing this or is it damage from hot weather? We fertilize and apply iron regularly.
A: The usual problem with photinia happens when it is planted in desert landscaping with rock mulch covering the surface of the soil.
It is normally planted with soil amendment in the planting hole, which disappears in two or three years. This organic amendment is important at planting but also important later in the plant’s life, when the amendment has disappeared.
Both fertilizer and iron are important. However, if you use the right type of iron product, the plant will look much better. If you use the wrong type of iron product, it can be hit or miss whether the iron will work.
The problem is one of soil and fertilizer. Sometime during the third and fifth year, photinia begins to develop yellow leaves. These yellow leaves become a brighter yellow and then begin to scorch around the edges.
If not corrected, photinia continues to decline and we see stem dieback and canopy thinning. This is a direct result of using rock mulch surrounding this plant. The plants like organic soils, not soils covered in rock.
To correct the problem, pull the rock mulch back and add compost to the soil surface around each plant. Apply about 2 inches of compost and dig it into the surface. Add water.
Add an iron fertilizer containing the chelate EDDHA. No other product will work if soils are really bad.
Next, cover the area with wood mulch, not rock mulch. Cut the photinia back close to the ground and let it regrow. Continually adding compost every two years will help keep this plant healthy.
The second option is to remove these plants and replace them with true desert plants that require less maintenance.
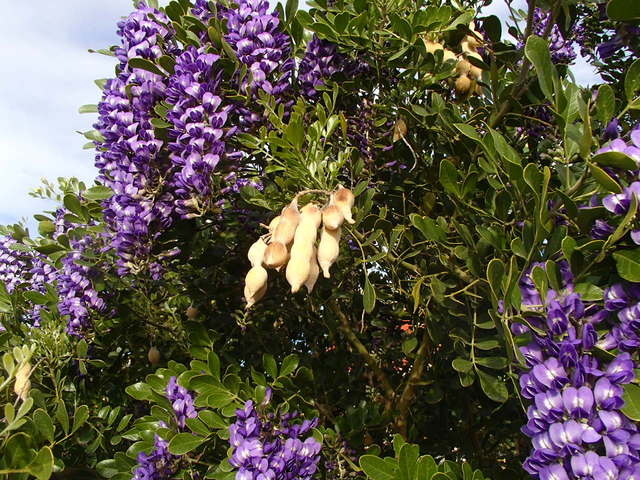
Q: I harvested some Texas mountain laurel seed. Can I expect them to grow if I plant them in garden soil? Should I remove the outer shell first?
A: Texas mountain laurel can be started or propagated from seed. But you first must overcome a major hurdle — the very hard coat around the seed, not the pod.
For seeds to germinate, they must absorb water, be at the right stage of development and have warm temperatures and air. This hard seed coat does not allow water to enter the seed and begin germination.
But damaging the seed coat without damaging the seed allows water to enter and germination to start. Trouble is, if the damage to the seed coat is too deep, the seed may die.
The easiest way to damage the seed coat safely is to use a file or sandpaper and scratch or nick the seed coat deep enough so this barrier is breached but not deep enough to damage the seed itself.
This requires practice and experimentation. I have read reports that the seed will germinate easily once this barrier has been removed.
However, to be safe, I would put the seeds in the refrigerator for about 60 days before damaging the seed coat. This refrigeration removes a possible second barrier that the seed may have.
Bob Morris is a horticulture expert living in Las Vegas and professor emeritus for the University of Nevada. Visit his blog at xtremehorticulture.blogspot.com. Send questions to extremehort@aol.com.


