
Malfunctioning recessed can light may be overheating


Q: A while ago you wrote about how to install a recessed can light. I already have this type of light, but I am having a problem with it. After it has been on for a while, it will sometimes just automatically turn off. Is this a problem with the electricity, the fixture or what?
A: You’re probably thinking that blinking lights don’t belong in the house, but that they belong outside during the holiday season.
It sounds like it’s the light fixture. Not that it’s broken, but that it is getting too warm and shutting down.
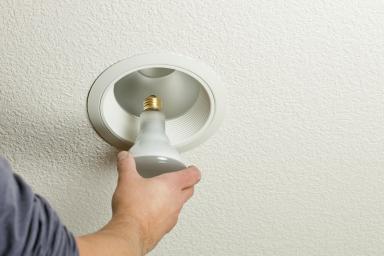
The can light you describe is likely an IC-rated light fixture. IC stands for insulation compatible, which means that insulation can be installed directly in contact with the light fixture. This fixture has a temperature cut-off switch in case it gets too hot.
There are several reasons why the fixture may be getting too hot. The easiest fix is to check the manufacturer’s label inside the light to determine if the correct light bulb and trim kit are being used.
The label will be inside the fixture, so you will have to unscrew the bulb to read it. It will tell you the different light bulbs that are compatible, as well as the maximum wattages. Your problem may be fixed by simply replacing the bulb.
These fixtures usually have a height adjustment feature for the bulb. If your fixture has such an adjustment, lower the bulb downward. This will allow less heat to build up inside the can.
Also, check the label to make sure the trim is compatible with the housing. There are trim numbers corresponding to each bulb type. Look for a part number on the trim or housing that you can use to determine if the parts are compatible. The wrong trim can trap too much heat inside the fixture, which will trip the shut-off switch.
Add to that the insulation covering the fixture and you can get a fixture that overheats and shuts off shortly after it is turned on.
It may also be that the shut-off switch is bad, but you are probably better off replacing the entire can if this is the case.
You can clear away the insulation above the can fixture, but then you will have to contain the conditioned interior air from escaping into the attic. You can do this by building an insulated box around the light fixture to ventilate the surrounding air space.
You can build the box out of rigid foam insulation. It comes in 4-by-8 sheets and costs around $10 for a 2-inch-thick sheet (or you can order premade boxes online).
The size of the box should span from one joist to the next, and there should be at least 3 or 4 inches between the top of the fixture to the top of the box. You will also have to notch the foam insulation to fit over the ceiling joists for a snug fit.
Glue the box together and use coarse drywall screws to hold the box together until the glue dries. Caulk the inside seams to make the box airtight. You can use construction adhesive to hold the box in place.
Mike Klimek is a licensed contractor and owner of Las Vegas Handyman. Questions may be sent by email to: handymanoflasvegas@msn.com. Or, mail to: 4710 W. Dewey Drive, No. 100, Las Vegas, NV 89118. His Web address is handymanoflasvegas.com.


