
Looking to save water? This system is relatively easy to install


Q: I plan to replace the grass in my backyard with shrubs, flowers and trees. How can I convert my existing sprinkler system to a drip system?
A: A drip system is relatively easy to install because there is no trenching involved. Therefore, it should take only a few hours with a starting cost from about $200 for an average-sized yard with an average number of plants.
First, you’ll need to plan the system. On a piece of graph paper, draw your house and where the plants will go. Also, indicate where the valve is located, then mark where the main drip line will go.
Most likely you’ll be able to supply the entire drip system with only one valve, but if you have doubts, use the following as a guide. Time how long it takes to fill a 5-gallon bucket.
If it takes 1 minute, then the maximum flow rate available per hour is 5 gallons x 60 minutes = 300 gallons per hour. Using 1 gallon per hour drip emitters, you could conceivably supply 150 plants, assuming each has two emitters.
I use two emitters on each plant so that if one emitter becomes clogged or breaks, I have a backup to keep the plant watered. If your system requires more water, simply divide the system by adding another valve.
Since you are converting from sprinkler to drip, you’ll need to cut away a section of sprinkler pipe just after the valve so that you can unscrew the old fitting from the valve. Remember, the valve stops pressurized water from entering the system.
If you’re unsure which side to remove, look on the top of the valve. There should be an arrow indicating which direction the water flows. Hint: If you cut the pipe and water sprays out continuously, you’ve cut the wrong side.
You don’t need to remove the old PVC pipe that’s been in the ground, but you do need to remove the old sprinkler heads, then cap the holes with screw-in plugs.
You also need to attach a filter to the valve. The filter has a screen inside, which can be removed for cleaning, and threads to attach to the valve. Wrap the threads three times with Teflon tape and screw it into the valve (you can also fertilize your plants with this filter by placing a water-soluble fertilizer tablet inside of it).
Next, you’ll need to install a pressure regulator, which will drop the water pressure to around 25 psi. Without the pressure regulator, the fittings and drip lines will blow away from the tubing. After the pressure regulator, you’ll screw on an adapter that will connect to the ½-inch poly tubing.
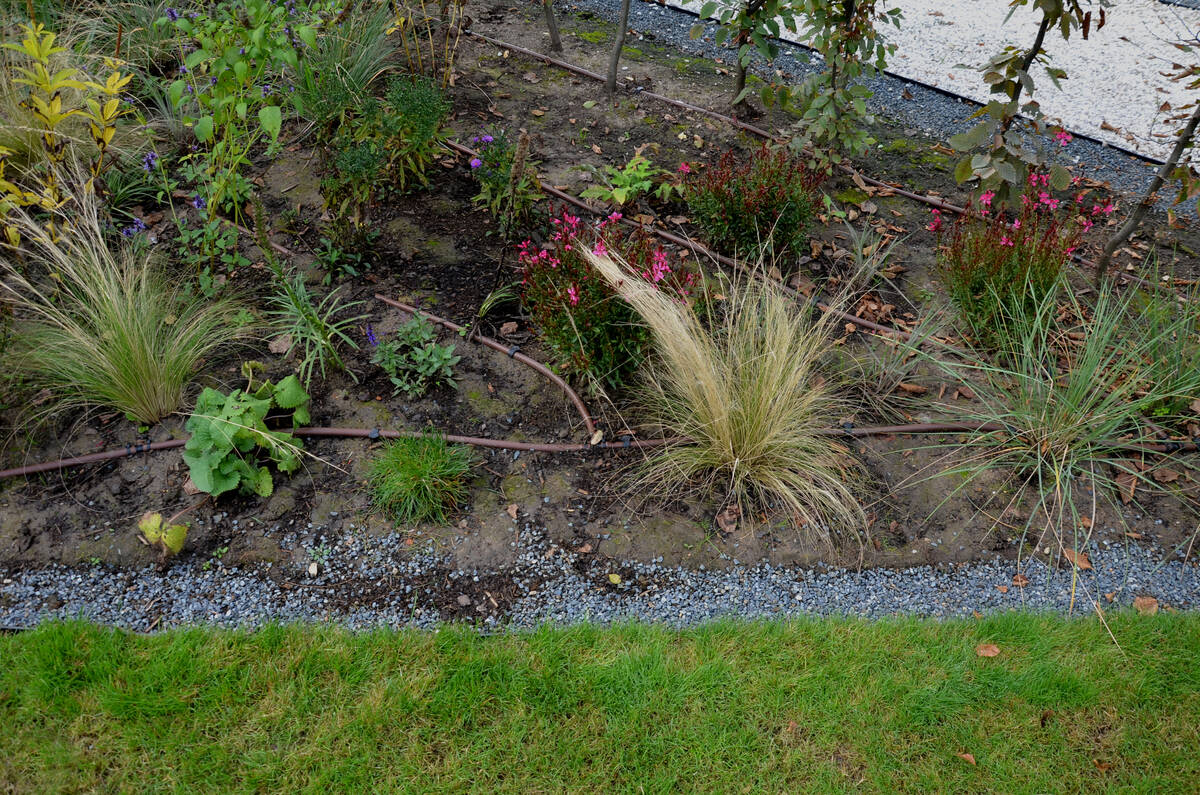
You’ll be using ½-inch poly tube unless you have a huge yard that requires a large volume of water, in which case you’ll need ¾-inch poly tubing. This tubing is flexible and resistant to ultraviolet rays, so it can be placed directly on the ground and covered with landscape rock if you choose. Generally, the drip system is laid out, the plants are planted, and then landscape rock is placed over the tubing.
Put the tubing in the sun to make it warm and flexible. Connect the ½-inch poly tubing to the pressure regulator adapter by forcing it into the fitting using a wiggling motion. Put the tubing in place according to your drawing. On the end of this tube, place an end cap that allows you to end the run of tubing as well as to flush the system of dirt.
From this main ½-inch tube, connect ¼-inch microtubes that will run to each individual plant. You’ll need a tubing punch (about $5) to puncture a hole in the tube. Attach the microtubes using barb fittings, which fit easily into the tubes. The microtube is easier to attach to the barb if it is warm, so let it sit in the sun or soak it in warm water.
Next, you’ll need to install a drip emitter on the end of the microtube. There are two types of emitters: flag and button. I prefer buttons because they tend to not clog up as much as flags.
I also use a “T” barb fitting on the end of the microtube and install two button emitters per plant. That way if one clogs, the plant still gets water.
Finally, use tubing stakes to hold the microtubes in place.
Mike Klimek is a licensed contractor and owner of Las Vegas Handyman. Questions may be sent by email to handymanoflasvegas@msn.com. Or, mail to 4710 W. Dewey Drive, No. 100, Las Vegas, NV 89118. His web address is www.handymanoflasvegas.com.
Do-it-yourself
Project: Converting a sprinkler system to a drip system
Cost: From $200
Time: Around a half day
Difficulty: ★★★


